


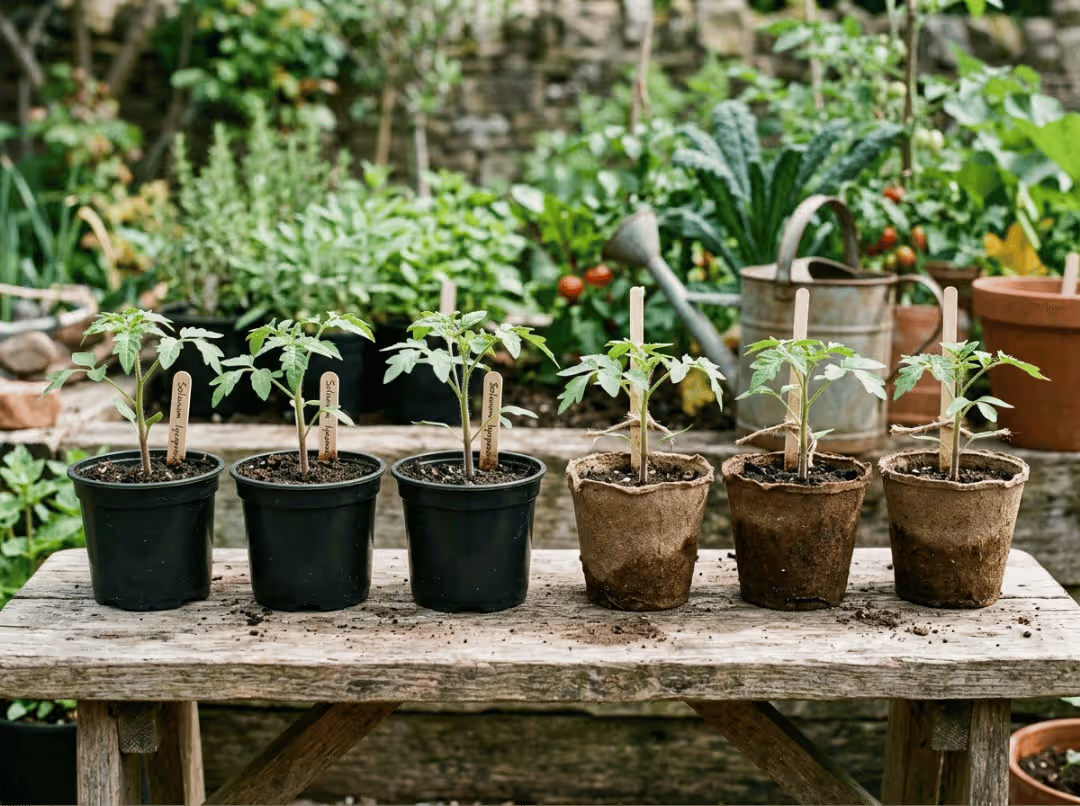
Every spring, millions of plastic nursery pots go straight to landfill. The ones that don’t tend to fragment slowly outdoors, releasing microplastics into garden soil over time. Biodegradable plant pots address this at the source — reducing plastic waste, improving transplant outcomes, and supporting healthier root development from the start. This guide explains what the labels actually mean, which materials suit which plants, and how to use them correctly so they deliver on that promise.
Why Plastic Nursery Pots Are a Real Problem
The Royal Horticultural Society estimates that over 500 million plastic plant pots are sold in the UK alone each year, most ending up in landfill due to contamination from soil and roots. The problem runs deeper than disposal. Hard-walled plastic containers cause root circling — roots wrap the interior and struggle to establish after transplanting, resulting in slower growth and higher plant loss rates. The argument for switching isn’t sentimental; it’s agronomic.
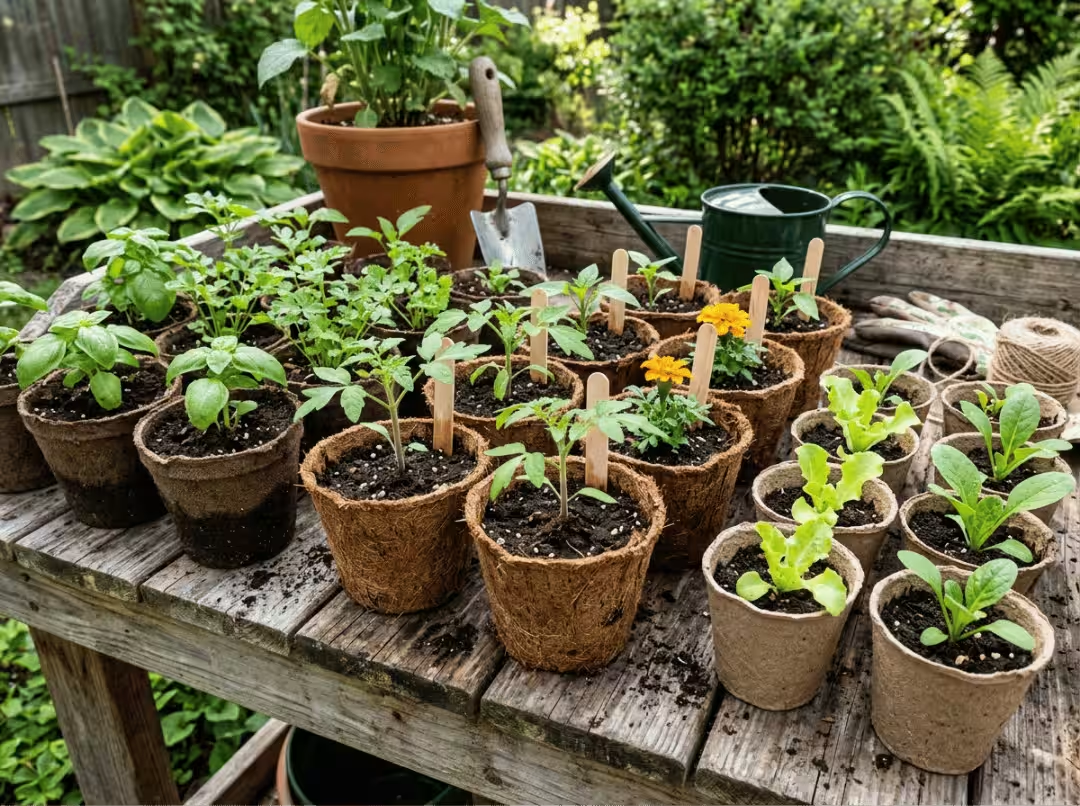
Biodegradable vs. Compostable vs. Plantable: What the Labels Actually Mean
These three terms appear on packaging as if they mean the same thing. They don’t.
Biodegradable means a material breaks down through biological processes. The label carries no regulated timeframe — a product could take six months or sixty years to decompose. Without an attached certification standard, the claim is effectively unverifiable.
Compostable is the more substantive label. Products certified to ASTM D6400 (US) or EN 13432 (Europe) must break down within a defined period under specific conditions — typically 90 days in industrial composting. Some products also carry home composting certification, but this is a separate designation and should never be assumed.
Plantable describes a pot designed to go directly into the ground at transplanting time. Most peat, coir, and paper pulp pots fall into this category — the pot stays with the rootball and breaks down in soil over weeks or months.
|
Label |
Regulated? |
Breakdown Timeframe |
Where It Breaks Down |
|---|---|---|---|
|
Biodegradable |
No |
Unspecified |
Varies widely |
|
Compostable |
Yes (ASTM D6400 / EN 13432) |
~90 days |
Industrial or home compost |
|
Plantable |
No formal standard |
Weeks to months |
In-ground soil |
When evaluating product claims, treat “biodegradable” alone as a caution flag. Prioritize pots with a recognized certification mark or a clear track record of in-ground breakdown.
The Main Types of Biodegradable Plant Pots
Peat Pots
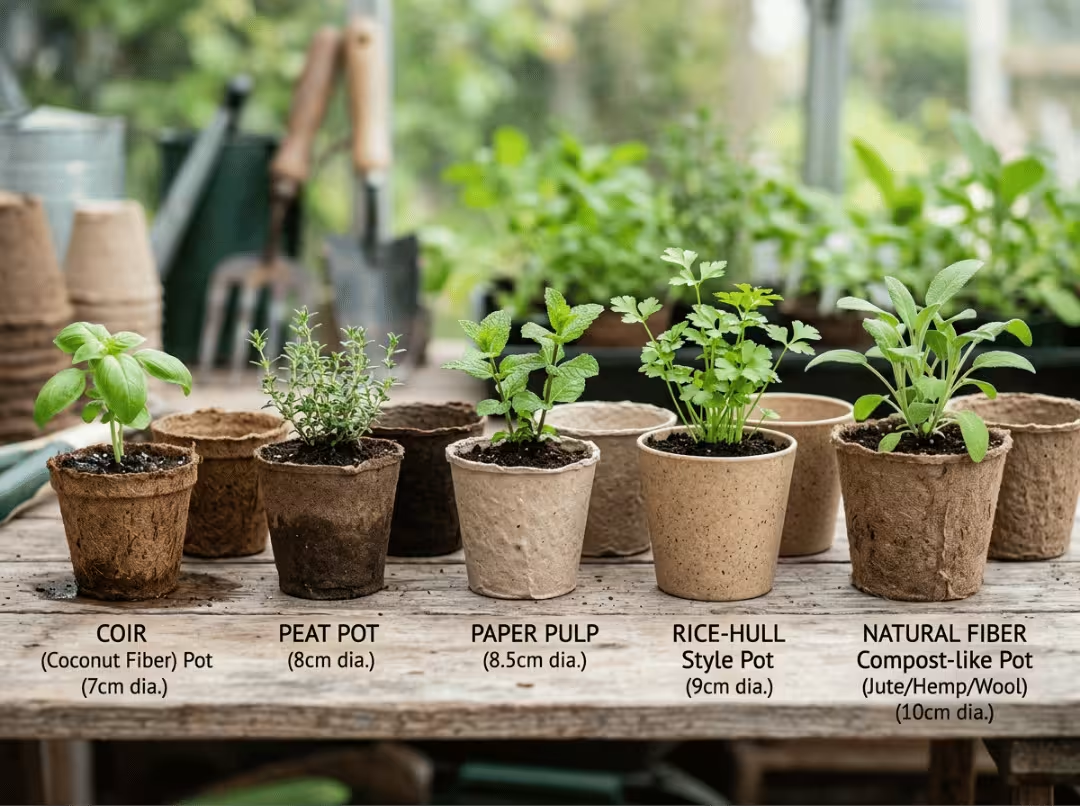
The most widely available option, and the starting point for most gardeners. Peat pots break down in 4–6 weeks in moist soil and perform well for seed starting and short-cycle crops — tomatoes, peppers, cucumbers. The sustainability concern is real: peat extraction degrades carbon-storing bogs. Coir is the most common alternative for growers who want to avoid it.
Coir Pots
Made from coconut husk fiber, a byproduct of coconut processing. Coir pots are structurally sturdier than peat and handle variable moisture better — they won’t collapse after repeated watering, and they don’t dry out as quickly in indoor environments. Breakdown takes roughly 6–10 weeks in moist soil. For indoor seed starting, greenhouse use, or moisture-sensitive plants, coir is generally the stronger choice.
Rice Hull / Rice Straw Pots
Lightweight pots made from agricultural waste that would otherwise be discarded. They break down relatively quickly and work well for seed starting and high-volume propagation. Less common at garden retail, but increasingly used by small commercial growers looking for affordable, sustainable options.
Wood Fiber / Paper Pulp Pots
The most structurally durable of the natural-material options. With an 8–12+ week breakdown timeline, these hold together through repeated watering and suit plants that spend a long time in the nursery — perennials, woody seedlings, or anything started well ahead of the outdoor growing season.
Manure / Compost Pots
Nutrient-dense pots that begin breaking down almost immediately in warm, moist conditions. They actively feed roots as they decompose, making them particularly effective for heavy-feeding vegetable starts like squash, corn, or brassicas. One timing consideration: these aren’t a good fit if transplant is still months away.
Bioplastic Pots (PLA)
Visually, PLA bioplastic pots look almost identical to conventional plastic. The critical difference is where they can break down — and for most gardeners, the answer is a problem. Standard PLA pots require industrial composting temperatures to decompose and will not break down in home compost bins or in garden soil. Unless you have reliable access to an industrial composting program, these pots carry an environmental claim they can’t deliver on in practice.
|
Material |
Breakdown Time |
Best Use Case |
Sustainability Note |
|---|---|---|---|
|
Peat |
4–6 weeks |
Seed starting, short-cycle crops |
Peat extraction concerns |
|
Coir |
6–10 weeks |
Moisture-sensitive plants, indoor starting |
Renewable byproduct |
|
Rice Hull / Straw |
4–8 weeks |
High-volume propagation |
Agricultural byproduct |
|
Wood Fiber / Paper Pulp |
8–12+ weeks |
Longer nursery periods |
Varies by source |
|
Manure / Compost |
3–6 weeks |
Nutrient-hungry vegetable starts |
Highly sustainable |
|
Bioplastic (PLA) |
Months to years in soil |
Industrial compost only |
Misleading without facility access |
How Biodegradable Pots Break Down — and What That Does for Roots
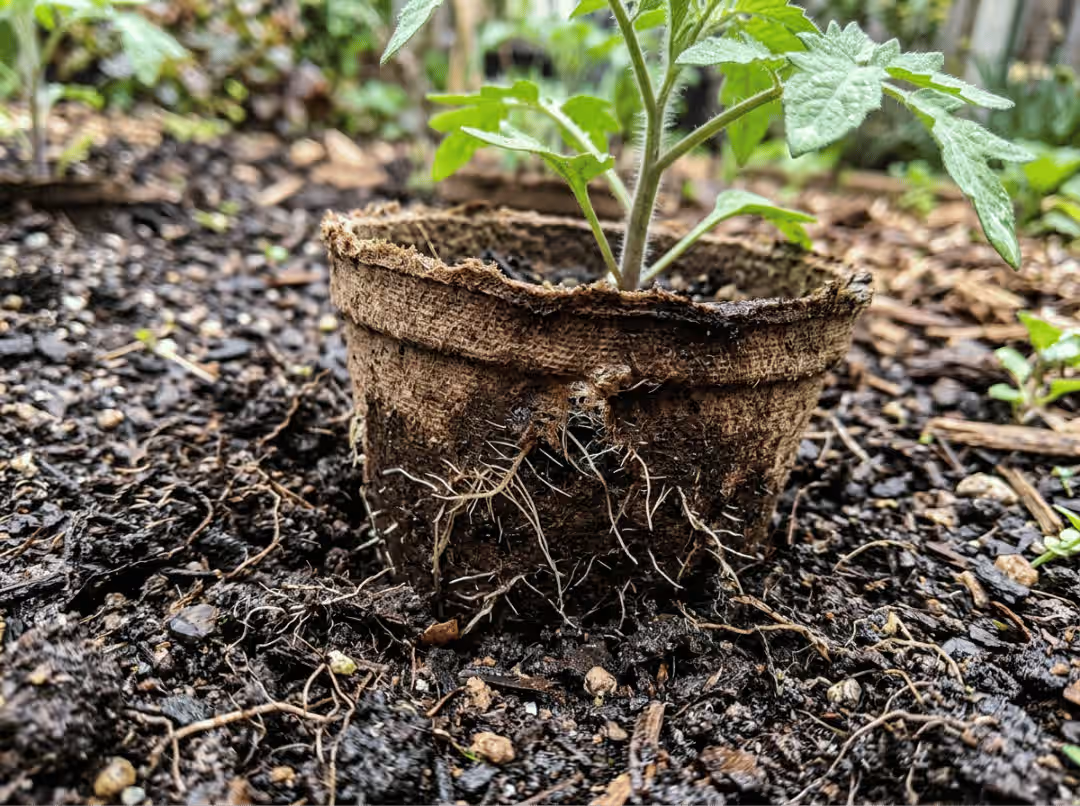
Moisture drives decomposition. As pot walls absorb water, they soften and become permeable — roots push through into surrounding soil without the circling behavior that hard plastic promotes. Warm, biologically active soil accelerates this significantly; cold or dry conditions can extend breakdown by weeks.
Two additional root benefits follow from the material properties. First, as walls soften gradually, roots establish directly into surrounding soil rather than being disturbed or unwound at transplant time. Second, peat and coir pots allow micro-aeration through their walls, which causes root tips to self-prune on contact with air. This process — air pruning — encourages denser root branching rather than continued elongation, producing a more robust root system before the plant ever goes in the ground.
The practical implication: the same coir pot might fully decompose in three weeks in warm outdoor soil or take twelve weeks in a cool indoor setting. Your actual growing conditions matter more than the manufacturer’s stated timeline.
How to Choose the Right Pot for Your Setup
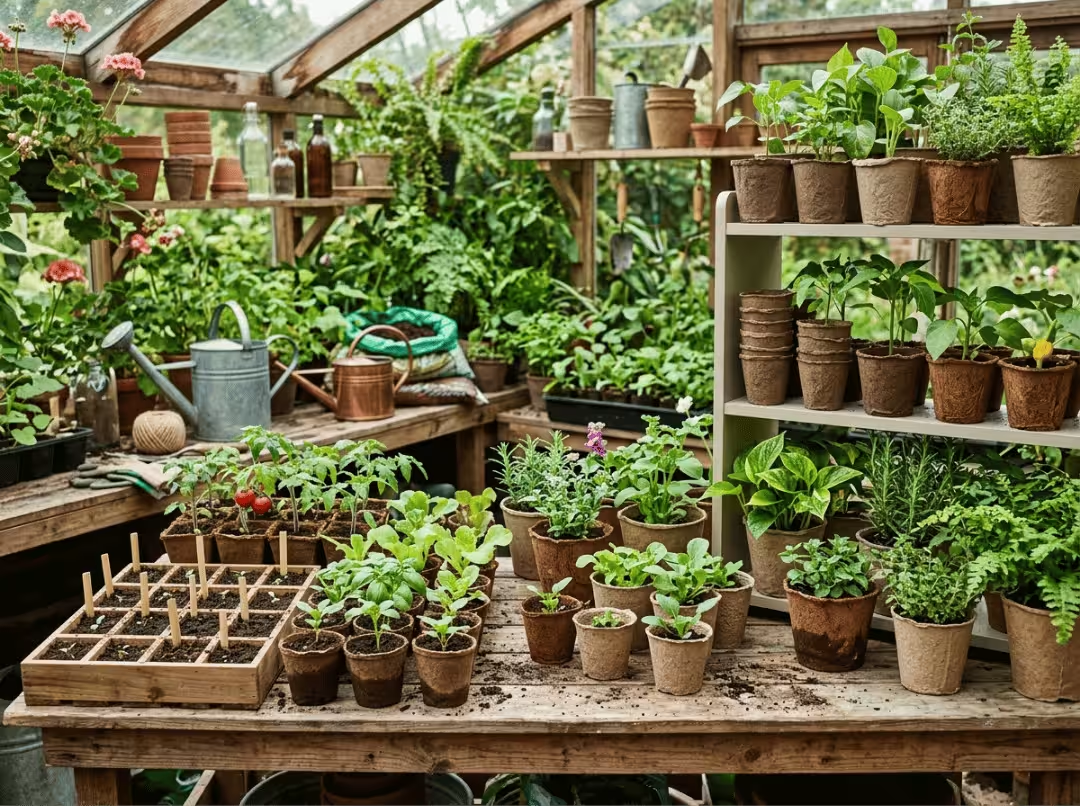
Match pot type to plant and growing timeline:
- Fast-growing annuals and vegetable starts (4–8 weeks to transplant): peat or coir
- Extended nursery periods (8+ weeks): wood fiber or paper pulp
- Heavy-feeding seedlings — squash, brassicas, corn: manure or compost pots
- High-volume seed propagation: rice hull pots for lightweight, affordable throughput
Match pot type to your environment:
- Outdoor beds with consistent moisture: most natural-material pots will perform reliably
- Dry or indoor growing spaces: coir handles variable moisture better than peat and holds its structure more consistently
- No access to industrial composting: avoid standard bioplastic pots — they won’t break down where you need them to
When reading labels, look for ASTM D6400 or EN 13432 certification on anything marketed as compostable. An unqualified “biodegradable” or “eco-friendly” label without a certification mark is a marketing claim, not a performance guarantee.
How to Plant with Biodegradable Pots Correctly
Most failures with biodegradable pots come down to technique, not the product. The two most common mistakes are planting the pot dry and leaving part of it above the soil line.
For seed starting: Fill pots to within half an inch of the rim, water from the base when possible, and transplant as soon as roots become visible at the pot wall. Waiting too long allows roots to push through the bottom and establish into the tray below — exactly the disruption these pots are designed to prevent.
For transplanting:
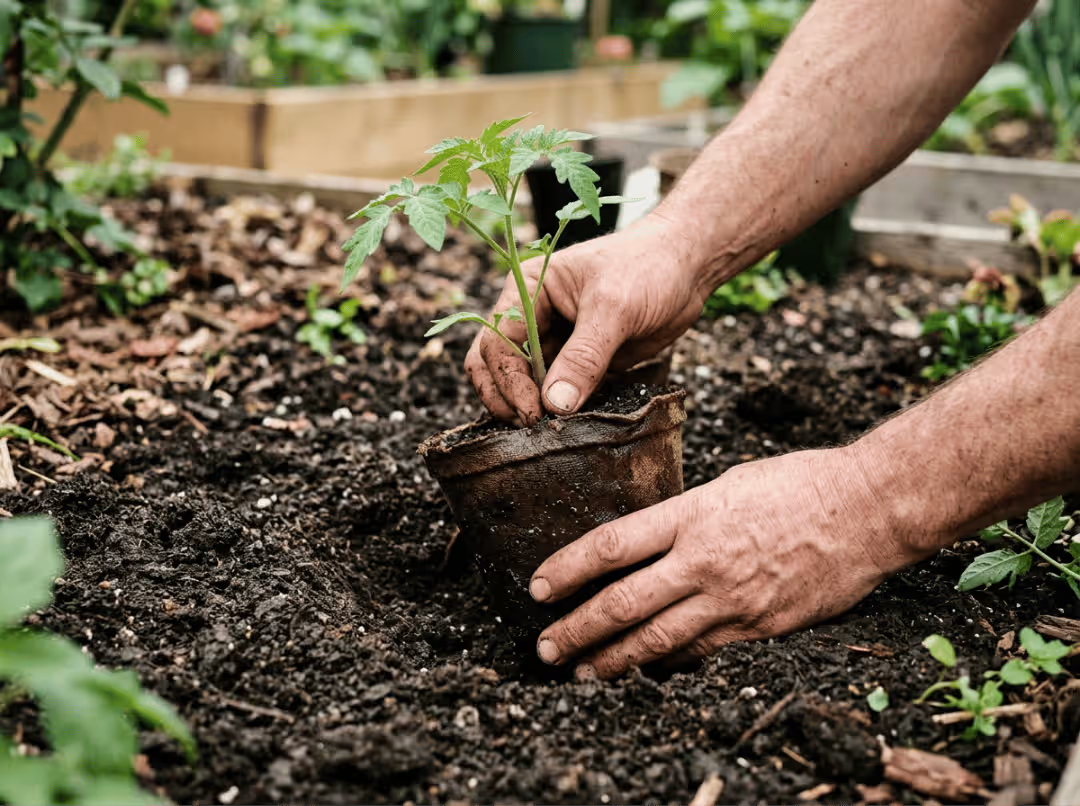
- Soak the pot thoroughly before transplanting — a dry pot resists decomposition and can restrict root expansion
- Dig the hole slightly deeper and wider than the pot
- Remove or fold down any rim or lip that would extend above the soil line — exposed pot material wicks moisture away from the root zone and slows breakdown
- Set the plant at the correct depth and firm soil against the pot walls to eliminate air pockets
- Water immediately after planting and keep the surrounding soil consistently moist for the first two weeks — this is when breakdown begins in earnest
Mistakes that undercut the benefit:
- Planting a completely dry pot into soil
- Leaving the rim exposed above the soil surface
- Expecting bioplastic pots to decompose in-ground without verifying their certification type
- Transplanting too late, after roots have already pushed well beyond the pot walls
Are Biodegradable Pots Worth It?
For seed starting and transplanting, the answer is yes — with clear caveats. Roots aren’t disturbed at planting time. There’s no pot to clean, store, or throw away afterward. Manure and compost pots add soil nutrition as a secondary benefit.
The trade-offs are real: natural-material biodegradable pots cost more per unit than plastic equivalents, require correct planting technique to perform as described, and vary in quality across manufacturers. Bioplastic pots carry meaningful risk of misuse for anyone without access to industrial composting infrastructure.
Before buying, identify which two or three plants you start most frequently, match them to the material type using the guide above, and verify the certification before purchasing. That single step separates pots that will deliver on their claim from those that won’t.
Frequently Asked Questions
Can I use biodegradable pots in raised beds or containers?
Yes, though results depend on conditions. In raised beds with good soil biology and consistent moisture, most natural-material pots break down reliably. In containers, the soil environment tends to be drier and more controlled, which slows decomposition. Coir typically outperforms peat in container settings due to its better structural durability and moisture management.
Will biodegradable pots develop mold before transplanting?
Surface mold — particularly on peat and paper pulp pots in humid conditions — is common and not harmful to the plant. It’s a sign decomposition has begun. To minimize it during the growing period, improve air circulation around the pots and avoid overwatering. Transplant promptly once roots are visible at the wall surface.
Do I need to remove the pot before planting?
For peat, coir, wood fiber, and paper pulp pots: no — these are designed to go directly in the ground. For bioplastic pots: yes, always remove them; they will not break down in soil. Regardless of material, always remove or fully bury any rim that would sit above the soil line after planting.
Are biodegradable pots significantly more expensive than plastic?
Per unit, yes. Peat and coir pots typically cost two to three times more than equivalent plastic pots at retail. The cost difference is partially offset by eliminated disposal, improved transplant success rates, and — in the case of manure pots — added soil nutrition. For high-volume commercial use, the economics shift depending on composting access and current plastic disposal costs.
How do I know if a pot is genuinely compostable?
Look for ASTM D6400 (US) or EN 13432 (Europe) certification on the packaging. These are independently verified standards with defined breakdown requirements. A label that reads “biodegradable” or “eco-friendly” without a certification mark has not been tested against any measurable standard. If the documentation isn’t on the packaging, ask the supplier directly.