


Picking the wrong process for a food tray, clamshell, or container lid costs more than a higher unit price. It shapes your tooling budget, lead time, and package design. It can also force a costly retool once orders grow.
I work with packaging buyers, food brands, product designers, and founders who face this choice every season. Most of them ask the same question: which process fits my package?
This guide gives you a clear answer. You’ll see when injection molding wins, when thermoforming makes more sense, and how to run the break-even math when both could work.
Injection Molding vs. Thermoforming: The Short Answer
If you want a fast direction, here it is.
Lean toward injection molding when your part needs threads, snap-fit lids, thick rims, or detail on both sides. Caps, closures, reusable deli containers, and cutlery belong here. The mold costs a lot upfront. At high volume, though, a low piece price makes up the difference.
Lean toward thermoforming when your package is open, thin-walled, and shaped on one side. Food trays, clamshells, produce trays, insert trays, and blister packs fit this profile. Tooling costs a fraction of a mold, and first parts often ship in weeks.
Real projects rarely sort that neatly. When a client sends me a package design, I weigh four factors together:
- Geometry. Does it need threads, undercuts, or a leak-tight snap fit? Or is it a shallow, open shape?
- Annual volume. How many units this year, and over the next three?
- Tooling budget. Can you fund a steel mold now, or must you keep upfront cost low?
- Performance needs. Does it seal, stack, hold hot food, or go in a microwave?
No single factor settles the choice. Keep these four questions in mind as you read on.
What Each Process Actually Does
You don’t need to run a machine to choose well. But you do need to know how each process shapes plastic, because that explains most cost and design limits.
Injection Molding in Plain Terms
Injection molding melts resin pellets and forces them into a closed steel mold under high pressure. Both mold halves shape the part at once, so you control the inside and outside.
That’s why threads, hinges, ribs, and thick sealing rims come out in one shot. High pressure also gives crisp detail and tight tolerances. A container lid from cycle one matches the lid from cycle one million. When a lid must snap onto a base without leaking, that repeatability often decides the project.
Thermoforming in Plain Terms
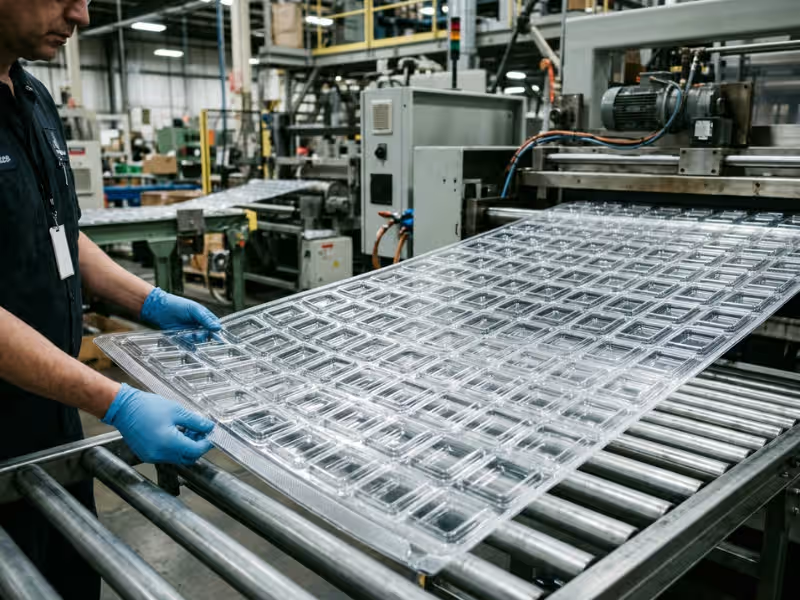
Thermoforming starts with a plastic sheet, such as PET, PP, or PLA. The machine heats the sheet until it softens. Then vacuum or air pressure pulls it against a one-sided mold. A trim press cuts the parts free.
The mold touches only one side, so the other side simply follows the shape. That suits open forms like trays, clamshells, and cup-style containers. In-line machines can form dozens of cavities per cycle, so thermoforming handles huge packaging volumes too.
Why These Two Processes Fit Different Types of Parts
Clients often ask me which process is “better.” That’s the wrong question. Each one follows its own logic, and your package either fits that logic or fights it.
Wall structure. Injection molding sets every wall in steel. A container can have a 0.6 mm body and a thicker 1.2 mm rim for stiffness. Thermoforming starts with one sheet gauge, and the sheet thins as it stretches, often by a third in deep corners. If your design needs thick and thin zones, forming can’t deliver them.
Geometry. Molding shapes both sides, so threads, tamper bands, and internal ribs are routine. Forming excels at wide, shallow, open shapes like a 12-cavity cookie insert or a produce tray. Deep, narrow pockets thin out fast.
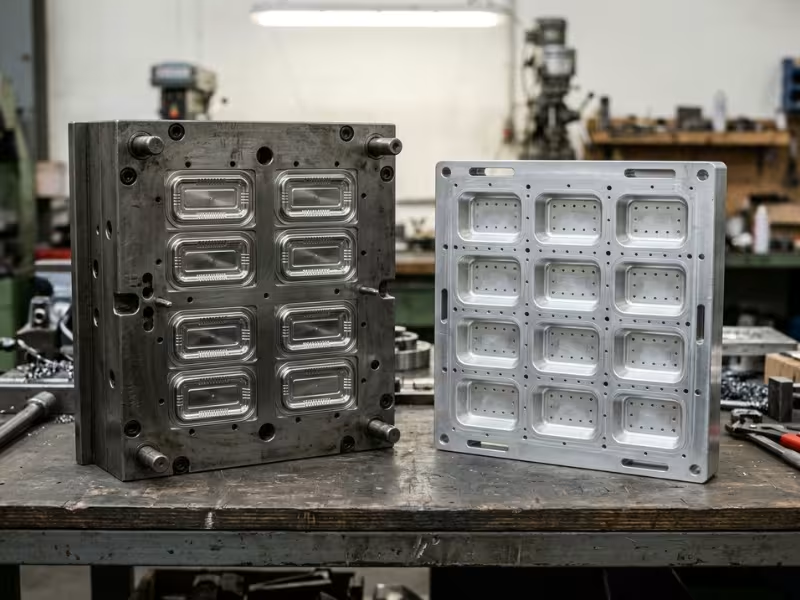
Tooling economics. A thin-wall packaging mold uses hardened steel, cooling channels, and often multiple cavities. It can cost $50,000 to well over $150,000. A production forming tool in aluminum often runs $5,000 to $30,000.
Neither process wins by default. The right choice matches the process to your package’s walls, shape, and volume.
Cost Comparison: Tooling, Unit Price, and Break-Even Volume
Most quote reviews I join start with the same mistake. Someone compares two piece prices and picks the lower one. Piece price is only half the bill. The other half is the tool.
Let’s split cost into three pieces: upfront tooling, per-unit price, and the volume where those lines cross.
Tooling Cost and Lead Time
A multi-cavity steel mold for a food container often takes 8 to 14 weeks to build and sample. A thermoforming tool usually ships first parts in 3 to 6 weeks. If you need packaging for a seasonal launch in five weeks, lead time may settle the choice before cost comes up.
Tool life differs too. A hardened steel mold can run millions of cycles. An aluminum forming tool handles most packaging programs well, but it wears faster at very high volume.
Per-Unit Cost at Different Volumes
Once tooling is paid for, the math flips. Molded parts come off finished, with no trimming. Formed parts need trimming, and the leftover sheet becomes scrap. Sheet also costs more per pound than pellets, because an extruder already processed it.
The table below uses a hypothetical two-compartment PP takeout container base, about 9 x 6 inches. Unit costs include tooling spread across the run.
|
Cost factor |
Injection molding |
Thermoforming |
|---|---|---|
|
Tooling cost |
$60,000 (4-cavity steel) |
$8,000 (multi-cavity aluminum) |
|
Tool lead time |
10–12 weeks |
3–5 weeks |
|
Piece price (no tooling) |
$0.08 |
$0.14 |
|
Unit cost at 50,000 pcs |
$1.28 |
$0.30 |
|
Unit cost at 2,000,000 pcs |
$0.11 |
$0.144 |
|
Break-even estimate |
About 870,000 pcs |
About 870,000 pcs |
At 50,000 units, molding costs four times as much per part. At two million, it costs about 25% less. Same container, opposite answer.
When Injection Molding Becomes Cheaper Overall
Use this formula to find your own crossover:
Break-even volume = (Mold cost − Forming tool cost) ÷ (Formed piece price − Molded piece price)
For the container above: ($60,000 − $8,000) ÷ ($0.14 − $0.08) ≈ 870,000 units.
Total program cost tells the story:
- 500,000 units: Molding costs $100,000. Forming costs $78,000.
- 870,000 units: Both cost about $130,000.
- 2,000,000 units: Molding costs $220,000. Forming costs $288,000.
Run this math on your total program volume, not your first order. Then add the costs quotes often skip: trimming, scrap (20% to 40% of the sheet), design changes, and freight. If your break-even lands close to your forecast, treat the project as a gray area.
Design and Part Constraints That Usually Decide the Process
Cost gets the attention in meetings. But in my experience, the drawing often decides the process before anyone opens a spreadsheet. Here are the four checks I run on every package.
Size, Depth, and Wall Thickness
Forming handles wide, shallow formats well, from sandwich wedges to catering trays. Draw depth is the limit. A 0.5 mm sheet can thin to 0.2 mm in a deep corner. Many formers get cautious once depth exceeds the opening width.
This rules out thermoforming if the part needs a deep, narrow cavity with even walls, or a thick rim with thin sidewalls.
Closures, Threads, and Undercuts
Turn the part over and check the back. Molding forms threads, tamper bands, living hinges, and tight snap beads in one shot. Forming can create shallow snap locks on clamshells, but not true threads or a solid sealing bead.
This rules out thermoforming if your package needs a screw cap, a tamper band, or a leak-tight lid for soups and sauces.
Tolerances, Finish, and Repeatability
Injection molding often holds ±0.002 to ±0.005 inches. Thermoforming typically holds ±0.010 to ±0.030 inches, and only the mold side looks crisp. For a deli container lid that must snap onto a base, those few thousandths matter.
This rules out thermoforming if two parts must seal tightly or both sides need a controlled finish.
Materials and Food-Service Performance
- Clarity: Forming leads with clear PET, rPET, and PLA. That’s why most clear clamshells and bakery domes are formed.
- Heat: CPET sheet forms into ovenable trays. PP works in both processes for microwave use.
- Compostable resins: PLA forms well into cold-food containers but softens near 50–55°C. For hot food, consider fiber-based options instead.
- Food contact: Both processes offer FDA-compliant grades. Always ask for material compliance documents.
Run these checks before you request quotes. If a package passes only one process, the choice is already made.
When Injection Molding Is the Right Call
When a client’s part checks most of these boxes, I tell them to start budgeting for a mold.
- Volume is very high and steady. Packaging molds pay off in the hundreds of thousands to millions per year.
- The part closes or seals. Screw caps, flip-top closures, and leak-proof lids need molded precision.
- It’s built to last. Reusable food storage containers need thick, even walls and a long service life.
- Features live in the part. Hinges, tamper bands, and stacking lugs come out of the mold ready to use.
- The design is frozen. Steel rework is slow and costly, so finish testing first.
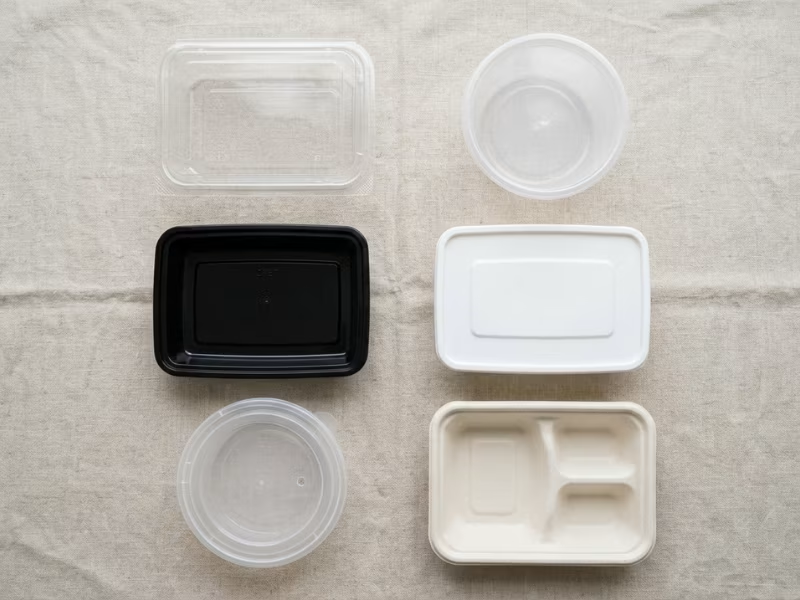
Typical molded packaging includes bottle caps, dispensing closures, reusable deli containers, cutlery, and thick-rim lids for hot soup. If your part looks like these, request molding quotes first.
When Thermoforming Is the Smarter Choice
Some buyers treat thermoforming as a budget fallback. I push back on that every time. For open packaging shapes, it often beats molding on cost, speed, and flexibility.
Signs Your Package Should Be Formed
- The shape is open and shallow. Detail on one side plays to the process’s strengths.
- You need clarity. Clear PET or PLA shows off food and retail products.
- You need speed. Many formers ship first parts in 3 to 5 weeks.
- Your design may change. Reworking an aluminum tool often costs a few hundred to a few thousand dollars.
- Volume is uncertain. An $8,000 tool limits your risk while demand grows.
Packaging Where Forming Wins Outright
- Clamshells. Salad, sandwich, and bakery clamshells form many cavities per cycle.
- Produce trays and punnets. Berry and mushroom trays need clarity and ventilation more than fine detail.
- Insert trays. Cookie, chocolate, and cosmetic inserts hold products in place inside a box.
- Display packaging. Blister packs and retail trays present products at low tooling cost.
- Disposable food containers. Takeout bases, deli cups, and portion cups are classic formed parts.
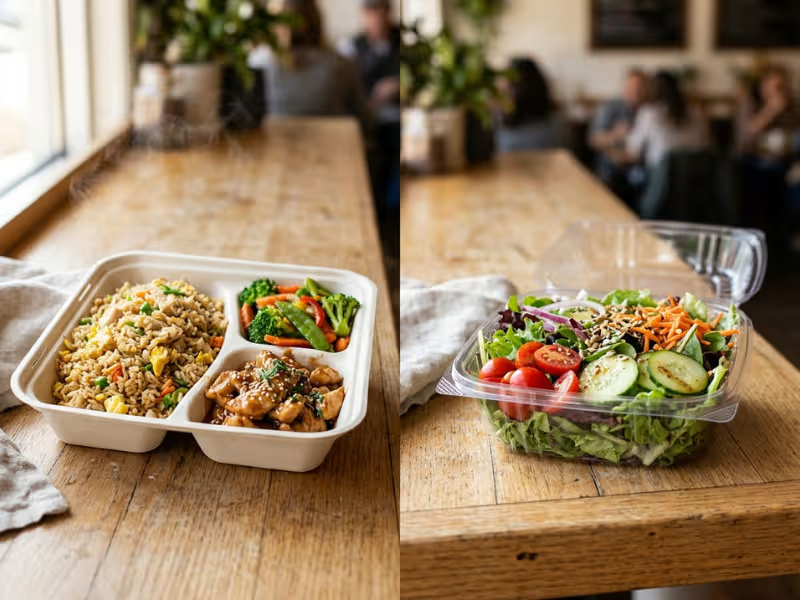
If you’re moving these formats to compostable materials, PLA sheet forms into clamshells and cold-food boxes well. You can compare ready-made biodegradable food containers before you invest in a custom tool.
For hot or greasy food in open shapes, plastic isn’t your only route. Fiber-based bagasse food trays are pressed from sugarcane pulp instead of formed from sheet, and they handle heat that PLA can’t.
Gray-Area Projects: How to Decide When Both Could Work
Not every package sorts itself neatly. Many drawings I review could go either way. The real question is which process carries less risk for your business.
What a Gray-Area Package Looks Like
Picture a PP lid for a 32-ounce soup container. Forming can make a decent lid. Molding can make a tighter, more leak-resistant one. Year-one demand might reach 500,000 units, or it might reach 3 million.
That’s the classic gray zone: mid-to-high volume, moderate sealing needs, and a forecast nobody can promise yet.
Five Questions That Break the Tie
- What is your committed year-one volume? Use real orders, not hopes.
- Does your three-year forecast clear break-even by a wide margin?
- How likely is a redesign? New menus and new brands change packaging often.
- How much tooling risk can you carry? Picture $85,000 in steel and sales stalling at 400,000 units.
- Could volume jump fast? One chain-restaurant contract can triple demand in a quarter.
If the forecast is shaky, start with thermoforming. Move to molding once volume holds steady for two or three quarters.
One warning: switching processes is not a file transfer. A molded lid needs new wall thicknesses, gates, and draft. Expect to redesign, retest the seal, and requalify the fit. Budget for that from day one.
A Simple Quote Comparison Example
Two quotes for the same lid can look worlds apart. Before a client reacts to either number, I put both side by side and read them as one project.
Here’s a recent-style case. A food brand needed that 32-ounce PP soup lid. We quoted it both ways, using the same resin grade and including trimming and packing in the formed price. That one step often shifts a formed quote noticeably.
|
Process |
Tooling cost |
Tool lead time |
Piece price |
Unit cost at 100,000 pcs |
Unit cost at 5,000,000 pcs |
Break-even estimate |
|---|---|---|---|---|---|---|
|
Injection molding |
$85,000 (8-cavity steel) |
12–14 weeks |
$0.045 |
$0.895 |
$0.062 |
About 2.4 million pcs |
|
Thermoforming |
$12,000 (12-cavity aluminum) |
4–5 weeks |
$0.075 (trim included) |
$0.195 |
$0.077 |
About 2.4 million pcs |
The tooling gap is $73,000. Each molded lid saves $0.03. Divide the first by the second, and you get about 2.4 million lids.
- 1 million lids: Forming costs $87,000. Molding costs $130,000.
- 5 million lids: Forming costs $387,000. Molding costs $310,000.
The forecast decided this one. The brand expected 1.5 million lids a year for three years, and the molded lid sealed better for hot soup. They chose molding, then ordered formed lids first to cover launch while the steel mold was built.
Design Tips Before You Send Your Package Out for Quoting
A clean RFQ gets you a faster, more accurate quote. A vague one gets padded prices and a long email chain.
For Injection Molding Quotes
- Keep walls uniform. Thin-wall packaging often runs 0.4 to 0.8 mm. Thick spots cause sink and warp.
- Add draft. Use at least 1° on vertical walls, more on textured faces.
- Flag sealing features. Mark snap beads, threads, and tamper bands as critical.
- Mark gate-free zones. Keep gate marks off label areas and food-contact rims.
For Thermoforming Quotes
- Check the draw ratio. Keep depth near or below the opening width.
- State your minimum finished wall. The former can then pick the right starting gauge.
- Define stacking and denesting. Add stacking lugs so trays don’t jam on packing lines.
- Mark the display face. It decides whether the former uses a male or female tool.
Questions to Ask the Supplier
- Can you review DFM before cutting the tool?
- What does the piece price include: trimming, packing, cartons?
- Do you provide food-contact compliance and material certificates?
- How many cavities, and what’s the expected tool life?
- How many sample rounds come before production?

Common Misconceptions
Most bad process decisions come from assumptions nobody questioned.
“Thermoforming means low quality.” Pressure-formed clamshells and retail trays carry crisp edges and clean display faces. Forming only falls short when you ask for threads or tight seals.
“Injection molding is always too expensive.” A $60,000 mold adds $0.60 per part at 100,000 units, but only $0.03 at 2 million.
“We can switch later without redesign.” A formed tray and a molded tray need different walls, draft, and features. Plan 8 to 14 weeks for the change.
“Samples must use the final process.” 3D prints and low-cost forming tools test fit and shelf appeal cheaply. Save hardened steel for a frozen design.
Sustainability Considerations
Sustainability rarely picks the process alone, but it can tip a close call.
Scrap. Forming trims 20% to 40% of each sheet. Most formers regrind it, but that loop still costs energy. Molding wastes less, especially with hot runner molds.
Material. Forming leads in rPET and PLA sheet for food packaging. Remember that PLA needs industrial composting to break down properly.
Design for recycling. Use one resin family per package. Avoid paper labels glued over the whole surface, and mold or emboss the resin code into the part.
Frequently Asked Questions
Which is cheaper, injection molding or thermoforming?
It depends on volume. Forming costs less at low and mid volume because tooling is cheap. Molding wins once its lower piece price pays back the mold, which for packaging often happens in the hundreds of thousands to millions of units.
Can thermoformed containers hold hot food?
Yes, with the right material. PP handles microwave reheating, and CPET handles ovens. PET, PS, and standard PLA soften with heat, so keep them for cold or room-temperature food.
Which process is faster for samples?
Thermoforming. A prototype tool can ship samples in about two weeks. A prototype mold usually takes 4 to 6 weeks and costs far more.
Can I switch from thermoforming to injection molding later?
Yes, and many brands plan it. Treat it as a new project with new design work, tooling, and seal testing.
Which materials work in both processes?
PP, PS, PET, and PLA run in both. Forming is stronger for clear and ovenable sheet. Molding is stronger for thick, rigid, reusable parts.
Which process suits compostable packaging?
Forming handles PLA clamshells and cold-food containers well. For hot, greasy food, molded fiber like bagasse often performs better than any compostable plastic.
Let the Whole Project Choose the Process
Every choice in this guide comes back to three questions. How many units will you need over the package’s life? What does the shape demand? How much can you spend before the first order ships?
Don’t let piece price make the call. An $0.08 molded container looks cheap until you see the $60,000 mold behind it. A $0.14 formed container looks expensive until you need only 200,000.
Before you commit:
- Prepare clean drawings that mark sealing features and the display face.
- Request quotes from both a molder and a former.
- Run the break-even math on your three-year forecast, then weigh tooling and redesign risk.
The numbers will show you which process fits your package.